Podstawowe informacje o kasynie Vox
Vox Casino online działa od 2024 roku i jest dostępne w 210 krajach. Zaufało nam ponad 7 milionów graczy z Polski. Poniżej możesz zapoznać się z naszą platformą:
| Kategoria | Szczegóły |
| 💻 Platforma | Vox Casino Poland |
| 📜Licencja | Curaçao (8048/JAZ2023-044) |
| 🎯 Dostawcy | 64+ różnych studiów |
| 🎰 Liczba automatów | Około 3 582 gier |
| 🎮 Rodzaje gier | Sloty, crash-gry, gry stołowe, loterie |
| 📺 Kasyno na żywo | Ponad 60 tytułów |
| 👑Klub VIP | 3 Poziomy z nagrodami |
| 💳 Metody płatności | Kryptowaluty, e-portfele, karty, przelewy |
| 💰 Minimalny depozyt | 20 zł |
| 🏧 Minimalna wypłata | 6–41 zł |
| ⏱️ Czas wypłaty | 1 minuta – 24 godziny |
| 🗣️ Język interfejsu | Polski, Angielski, Niemiecki |
| 🆘 Wsparcie | Czat na żywo i e-mail 24/7 |
Aktywni gracze z Polski mogą walczyć o miejsce w rankingu „Top wins”. Co 30 dni aktualizujemy listę zwycięzców, bazując na pojedynczych wygranych do 20 000x stawki. Funkcja dostępna jest dla każdego użytkownika zarejestrowanego w systemie.
Bonusy w kasynie Vox


- Bonus za wpłatę pierwszego depozytu
- do 125% + 100 DS
- Maksymalna kwota bonusu 2 000 PLN

- Bonus za wpłatę drugiego depozytu
- do 150% + 100 DS
- Maksymalna kwota bonusu 2 000 PLN

- Bonus za wpłatę trzeciego depozytu
- do 175% + 150 DS
- Maksymalna kwota bonusu 3 000 PLN

- Bonus za wpłatę czwartego depozytu
- do 200% + 150 DS
- Maksymalna kwota bonusu 3 000 PLN


Logowanie i rejestracja w Vox Casino
Założenie konta w Vox Casyno trwa średnio 2–3 minuty. Dla ułatwienia, poniżej znajdziesz prostą instrukcję, jak przejść proces rejestracji krok po kroku:
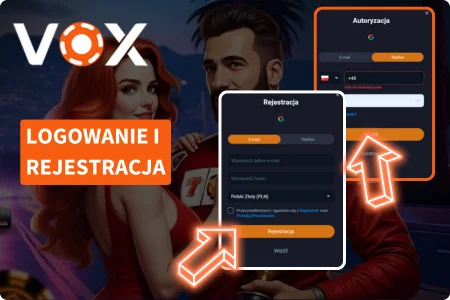
- Wejdź na naszą stronę główną casino Vox.
- Kliknij „Rejestracja” w prawym górnym rogu ekranu.
- Wybierz jedną z trzech opcji rejestracji e-mail, numer telefonu lub konto społecznościowe.
- Wypełnij formularz, podaj adres e-mail, hasło, wybierz walutę (np. PLN, EUR).
- Zaakceptuj regulamin i politykę prywatności, zaznaczając odpowiednie pola.
- Naciśnij „Rejestracja”, by zakończyć proces tworzenia konta.
Po rejestracji możesz logować się w dowolnym momencie. Proces logowania jest szybki i bezpieczny:
- Przejdź na główną stronę platformy i kliknij „Wejdź”.
- Wpisz e-mail lub numer telefonu oraz hasło.
- Zaloguj się i ciesz się pełnym dostępem do gier, promocji w sklepie i koła fortuny.
Dla wygody zapisz swoje dane dostępu lub dodaj stronę do zakładek. Jeśli zapomnisz hasła, kliknij „Zapomniałeś hasła?” i postępuj zgodnie z instrukcjami.
Aby być na bieżąco z najnowszymi informacjami Vox Casino, skorzystaj z zakładki 'Nowości' na dole strony głównej.
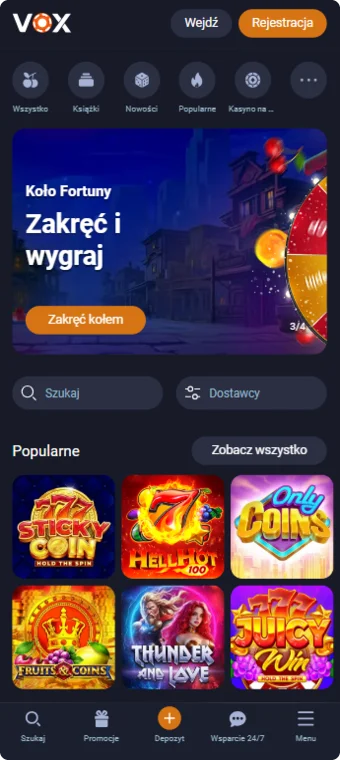
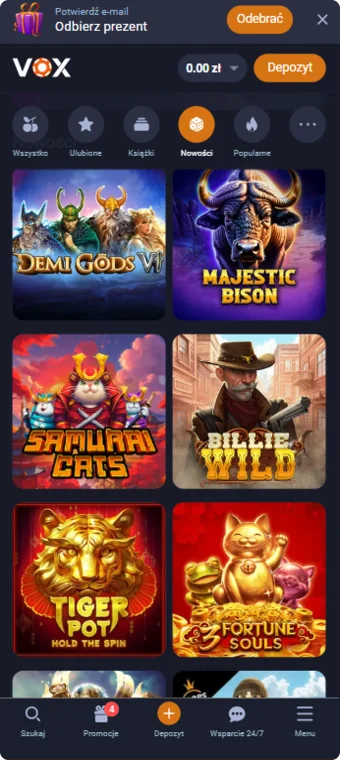
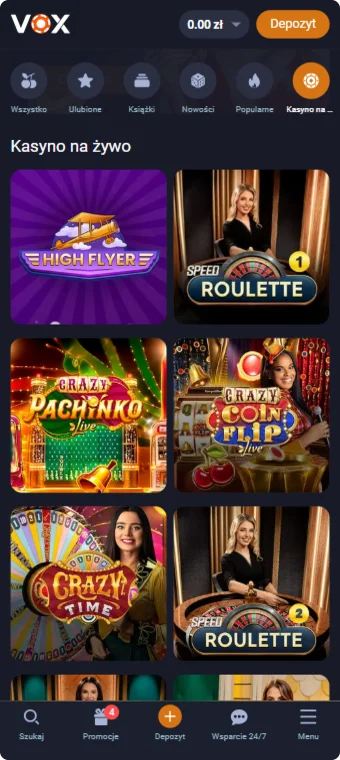
Zrzuty ekranu kasyna


Licencja i legalność naszego kasyna w Polsce
Działalność Vox Casino PL na terenie Polski jest zgodna z przepisami międzynarodowego prawa hazardowego dzięki licencji Curaçao nr 8048/JAZ2023-044. Gracze z Polski mogą bezpiecznie korzystać z platformy, mając gwarancję nadzoru i zgodności z obowiązującymi standardami.

Vox Casino 24 zapewnia pełną transparentność działania oraz ochronę danych graczy. Wszystkie transakcje finansowe są szyfrowane 256-bitowym protokołem SSL, a gry oferowane na naszej stronie podlegają cyklicznym testom RNG prowadzonym przez niezależne laboratoria. Ponad 91% tytułów posiada certyfikaty RTP powyżej 95%, co daje realne szanse na uczciwą rozgrywkę.
Co sprawia, że nasze kasyno jest numerem 1 w Polsce
Z przeprowadzonych ankiet wynika, że ponad 92% graczy z Polski ocenia Vox Casino jako niezawodną i wygodną platformę do gry. Poniżej prezentujemy najważniejsze elementy, które wyróżniają Vox Casino Poland na tle konkurencji:
- ➕ 🎮 Ponad 3000 gier: Automaty, gry stołowe, live casino.
- ➕ 💸 Wypłaty do 24h: 87% transakcji realizowanych w mniej niż 2 godziny.
- ➕ 📱 Wsparcie mobilne: Pełna zgodność z Androidem i iOS.
- ➕ 👑 Program VIP: 3 poziomy, cashback i oferty specjalne.
- ➕ 📅 Kalendarz wydarzeń: Codzienne turnieje i akcje promocyjne.
- ➕ 🎁 Skrzynie: 3 losowe nagrody gwarantowane po każdym otwarciu.
Nasza platforma oferuje również personalizację profilu – 100% nowych graczy korzysta z opcji własnego awatara. Dzięki prostemu interfejsowi i średniemu czasowi logowania wynoszącemu 18 sekund możesz zacząć grać niemal natychmiast.
Gry kasynowe
W Vox Casyno każdego dnia tysiące aktywnych graczy korzysta z naszej biblioteki ponad 3582 gier. Tytuły pochodzą od 64 licencjonowanych dostawców, w tym NetEnt, Evolution i Microgaming. Oto główne kategorie i przykłady gier:
| Rodzaj gry | Ilość gier | Przykłady |
| Automaty | 2 000+ | Rooster Mayhem, Dice Club, Joker’s Jewels, Cash Patrol |
| Gry stołowe | 300+ | Super Video Poker, Black Jack, Baccarat, Dragon Tiger |
| Drops & Wins | 68 | Book of Monsters, Tiny Toads, 7 Clovers of Fortune, Book of Fallen |
| Kasyno na żywo | 200+ | Speed Roulette 1, Crazy Pachinko, Crazy Time A, Easy Blackjack |
Większość slotów dostępna jest w trybie demo. Możesz grać bez ryzyka i testować mechanikę automatów zanim postawisz pieniądze. Nasze gry z krupierami na żywo transmitowane są w jakości HD i dostępne 24/7. Ponad 80% stołów obsługiwanych jest w języku angielskim, a wiele z nich oferuje funkcję czatu na żywo z prowadzącym.
Aplikacja Vox


Nasza aplikacja działa na systemach Android 5.0 lub nowszym oraz iOS 11.0+. Do instalacji potrzebujesz co najmniej 50 MB wolnego miejsca oraz stabilnego połączenia z internetem. Obecnie aplikacja nie jest dostępna w sklepach Google Play i App Store — plik APK pobierzesz bezpośrednio z naszej oficjalnej strony. Z danych wewnętrznych wynika, że ponad 79% graczy z Polski korzysta z Vox Casino właśnie przez aplikację. Zalecamy regularne sprawdzanie aktualizacji, każda nowa wersja zawiera usprawnienia techniczne, nowe opcje oraz poprawki bezpieczeństwa.
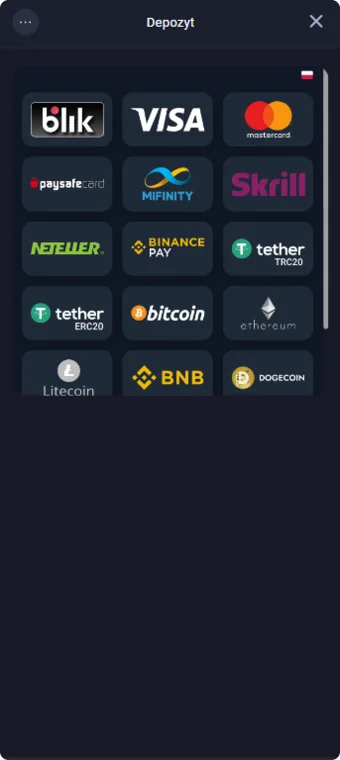
Wygodne metody płatności w kasynie Vox
W Vox Casino 24 udostępniamy 18 metod płatności online. Każda opcja działa szybko, bez opłat i spełnia standardy bezpieczeństwa. Poniżej znajdziesz aktualne limity wpłat dla najpopularniejszych metod:
| 💳 Metoda | 🔢 Limit wpłaty (min–max) |
| 20 – 5 000 PLN | |
| 25 – 45 000 PLN | |
| 25 – 45 000 PLN | |
| 25 – 4 200 000 PLN | |
| 50 – 10 600 PLN | |
| 20 – 4 200 000 PLN | |
| 130 – 4 200 000 PLN | |
| 20 – 4 200 000 PLN | |
| 20 – 4 200 000 PLN | |
| 20 – 4 200 000 PLN |
System casino Vox PL obsługuje przelewy natychmiastowe. Większość operacji realizujemy w czasie krótszym niż 2 minuty, a wszystkie płatności są chronione 256-bitowym szyfrowaniem SSL.
Obsługa klienta kasyna
W Vox Casyno priorytetem jest szybka i skuteczna pomoc. Nasz zespół dostępny jest 24/7 zarówno przez stronę internetową, jak i aplikację mobilną. Nie wymagamy logowania, aby rozpocząć rozmowę z konsultantem.

Oto dostępne kanały kontaktu:
- 💬 Czat na żywo: Całodobowe wsparcie bezpośrednio przez okno rozmowy.
- 📨 Formularz e-mail: Do kontaktu w sprawach wymagających szczegółowego opisu.
- 📚 FAQ: Gotowe odpowiedzi na najczęstsze pytania.
- 📞 Telefon: Szybki kontakt bezpośredni z konsultantem.
Obsługa prowadzona jest w języku polskim, co znacznie ułatwia wyjaśnianie problemów technicznych lub finansowych. Zespół Vox Casino PL pomaga w przypadku problemów z kontem, płatnościami i dostępem do gier. W ciągu ostatnich 30 dni średni czas odpowiedzi na czacie wyniósł 1 minutę 18 sekund.
Często zadawane pytania
Zdobądź bonus Vox w wysokości 125% + 100FS!
Grać