Tuesday, January 29, 2013

What We Accomplished Wednesdays #2

Whoa...where did the week go?  I've been so busy it just flew by.  I'm so excited that my new organizing system is working for me.  I'm getting so much accomplished.  I did a lot of unexciting things this week, but some pretty exciting ones as well.  Let's save the best for last shall we?

What I Accomplished this week:

Dejunked, threw away and gave away tons of stuff from the closet in the old office (soon to be moving to a new room).  Stacked what was left back in temporarily, until the new office gets built.


Cleaned out the "school" cabinet and moved it downstairs for use in the craft room (Ok the guys moved it...I cleaned it out!) Sorry no pics yet.

Cleaned, organized, and ruthlessly culled crap stuff from the basement storage shelves.  Here's the before and after:
Painted Shelves for one of the craft room cabinets


Decluttered and spruced up my blog sidebar at bit.  There's more to be done though.

Hubs dragged this old cabinet down out of the barn rafters.  I vacuumed the 1/2" layer of dust off it, removed old contact paper and cleaned the bejeepers out of it.  Then I attached boards to the back to reinforce it and get it ready to hang in my craft room.  I will be doing some more work on it and sharing what I did soon!


Now for the more exciting stuff!

Started my first linky party...Yeehaw!  Today's post is the second, so pretty please, link up...it doesn't have to be a new post either.  I also created new blog buttons.  These will be my last (I've been trying to find the look I want).  I think I finally nailed it.


I glued together (industrial glue) drawers for my middle cabinet in the craft room and painted them.


Having shared all this, I have to admit I overdid it.  I'm so wiped out today, I have been pretty much useless.  My fibromyalgia is acting up and I've had a mild case of vertigo all day.  I keep listing to the left. Today I truly am a dizzy blonde!

I needed to put the brakes on.  I've had my backside plastered to this recliner most of the day.  I've melted so completely into it that I think they will have to carry me, chair and all outside, let me freeze, then slam down the foot stool lever to pop me out like an ice cube!

There goes ma boys!  I think she sailed clear over the chicken coop!

funny gifs

Laughter - The Best Medicine!

Until next time, keep craftin' and smiling!  Oh and don't forget to link up your accomplishments, be they from this week, or 100 years ago.  I'd love to see them!  


Monday, January 28, 2013

Pinterest Inspired Monday - Muffin Tin Storage


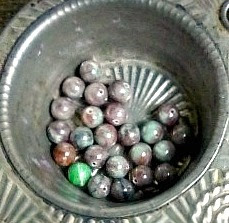
Vintage Muffin Pan Bead Tray


vintage muffin pan

Long ago and far away, I pinned many pins.  Actually, I've only been on Pinterest about a year.  In that time I've managed to pin, oh...5138 pins and counting.  Ahem...My name is Deborah, and I am addicted to Pinterest.

bead storage

Before you drag me off to PPA (Pinterest Pinheads Anonymous), in all fairness, I have used many of my pins to inspire, design and sometimes downright copy (for personal use only).  So in the interest of redeeming some of that time spent on Pinterest,  I am making an effort to create or make one Pinterest inspired something a week, be it a craft, a storage idea or even a few recipes.  Most weeks it will be something quick and easy, cause' I've already got a lot of irons in the fire!

vintage bead storage idea

So...I've decided Monday's will be Pinterest Project Monday.  Today's Pinterest Project is a complete copy.  I needed something to hold the beads I'm using while working on a piece of jewelry.

craft room storage

I could have just used an old egg carton, but where's the fun in that?  So when I saw this old muffin tin used for buttons, I said, "Eureka!"  Ok, not really...who ever says that?  But the light bulb did go on.

Theirs

I have a vintage muffin tin, and I dare say mine is even cooler!  No slight intended to our button filled friend here.

Mine
Old muffin tin

What would you do with a vintage muffin tin?

Vintage Muffin Tin

Have you copied any great pins lately?

Blessings,


I've linked to these awesome parties:

My Uncommon Slice of SuburbiaToday's Creative BlogTuesday To Do Party
PhotobucketUndertheTableandDreaming
Photobucket

Friday, January 25, 2013

Bead Storage Rack for the Craft Room


Most of my beads are in these round, stacking, screw-together containers. I love that I can see everything I've got at a glance. I can also sort beads by color families, making selection for jewelry making so much simpler. However, I don't want to store them three and four deep in a cupboard. Kind of defeats the purpose, you know?

When I saw this bead shelf on Pinterest, I knew what I wanted to build.


This was such a fast and easy build.  These shelves would be great for all kinds of storage. I'm thinking spices, jars of craft supplies, small office supplies...I could go on and on.

I had some aged boards, but not enough. Instead, I used scraps of new 1/2 x 4 boards and started playing around to get the look.  This old board is sort of what I was shooting for, but a little darker.
The old board is on the left; my trial is on the right.  They look really orange in this picture, but they aren't.


I would have started with stain, but I don't dare open anything flammable in the basement since we have a wood furnace down there. The fumes don't do me any good either! This girl wasn't going to be staining anything in below zero weather either, so going outside was out...pun intended.

So I did what I do best, started slopping a little of this and a little of that around.  This was a complete experiment, but I like the way it turned out.  These are the supplies I used.


I was thinking of using the whole tea, vinegar and steel wool technique, which I've done before, but that takes time to develop, and I wanted to do it now!  Unfortunately, patience is not my best quality. So I brewed a pot of coffee. Don't you brew coffee when you are impatient?

 I drank some, and the wood drank some...literally. I brushed the coffee on the raw wood. I'm not sure how much color the coffee added, but that's what I did.

Coffee

While it was wet I sprayed some walnut ink, brushing it out quickly, before it dried.  


Spray the walnut ink every 6 inches or so.


By the time I finished the last board, the first boards were dry enough for the next step. I slathered them with another coffee bath, then brushed on a small amount of antiquing glaze.  I used McCloskey's Aging Glaze in Ageratum (black).


I worked quickly to blend the glaze evenly.  Then let them dry. 


I did both sides of all these steps, on both sides of the boards at the same time...told you I was impatient.  But if I'd been patient and let one side dry first, I wouldn't have discovered this very cool effect. When I turned a board over to let the other side dry, I saw this:


And this:


After I shoved my heart back down my throat (thought I'd ruined the boards), I realized it sort of looked like worm tracks in old wood.  See the wavy pattern in the board...my technical term for them is squiggles.  I let the first board dry that way.  As I watched it, the squiggles relaxed and blended themselves in.  I took each of these pictures about a minute or two apart.


The following picture is how it looked when it was dry.  Pretty cool huh?


The board below has more pronounced squiggles.  Makes me want to giggle.


I found if I let the board dry longer before I turned it over, I got the above result.  It was still slightly damp, so I rubbed some of them and it blended the glaze a little better.  I didn't want all my boards this squiggled :)

Okay, I've squiggled enough.  Time to put the bead rack together.  Basically I just built a box with my short boards inside the long boards like so:


I used wood glue and my brad nailer to attach them together.  Once the box was built, I did a dry run with the shelves, and marked the location of each one.  Then I disassembled it and glued the end of a shelf, slipped it in, and nailed three times on each end.  Lather, rinse, repeat until all the shelves are attached.


The whole project from cutting to finish only took about an hour and a half.  


Here it is, half filled with beads.  I have a lot more beads to fill it.  In fact, I may have to build another one on the other side!


The rest of the craft room is coming along.  I still have a lot to do, but I've moved a lot of stuff in already.  It's just not ready to show yet.  I built a middle cabinet on my long wall of cabinets seen here.  I'm excited to show you that soon, when I get a few more things finished on it.  

If you missed it, I started a linky party on Wednesdays, called What We Accomplished Wednesdays.  It's brand new, and it's a little lonely.  I'd love for you to link up your latest project! Head here and join in!


I've linked to these great parties. Come join the fun!


LinkWithin

Related Posts with Thumbnails