Monday, November 24, 2014

Pleated Christmas Ornaments


 Time is ticking...what was I thinking signing up for a craft show three weeks before the event, and three weeks before Christmas? Granted, I have a lot of things made, but my brain is crammed with ideas of things to make. Workin' my fingers to the bone! But I am loving it! I feel a little like Professor Hinkle from the movie Frosty. I've got to get busy, busy, busy!


I had so much fun making these pleated lolly style ornaments. I want to keep them all, but I cannot. I will be making some for myself later though.


I didn't take pictures of the process as I just don't have the time. But I found this excellent tutorial over at Craftaholics Anonymous if you want to make your own.

These are also available in my Etsy store. Now in my best Professor Hinkle voice...I've got to get busy, busy, busy!

Blessings!

Tuesday, November 18, 2014

What We Accomplished Wednesday #66

Want to be a pin-up girl? Join the party, and if you are featured, I'll pin your project to my Green Willow Pond Features Board!


Oh the weather outside is frightful, but the fire is so delightful!  We've been running our wood burning furnace for several weeks now and I love the warm heat it gives. The older I get, the harder the winters are to take.  As much as I love the sparkling snow, the cold really gets to me.

It also makes it hard to spray paint anything.  I wanted to spray prime some faux fruit so I took it outside in a box and tried spraying it in there, then brought it back into the house immediately.  Time will tell if I ruined the fruit or not. And even though the spray mist was outside, it sure did stink up the house!

I've been crafting up a storm lately, and shared these posts since our last party.  If you missed them you can catch up by clicking the links below the pictures.


Picture source unknown

I'm not the only one whose been busy.  Take a look at these great project features from the last party! 

Robin, from High Point Circle shared her gorgeous new kitchen remodel. Love those upper lighted cabinets!


Aren't these felted acorns adorable?  Kristi, from Making it in the Mountains, shows how to make them and she created a garland out of them. Too cute!


I love this sweet little armoire that Mary, at Orphans with Makeup, painted for a special child. What a perfect little cabinet!
Aren't these the cutest little wooden trees?  Heather, at Woods of Bell Trees, layered green and white paint to achieve this snow frosted look.


Marty, from A Stroll Thru Life, has such elegant taste.  She can transform her living room with a few well chosen elements.  She did it again here with some beautiful pillows, white accessories and a furry throw.


What is cuter than a pair of baby shoes? Baby shoes that Patti at Ivy and Elephants has plied her magic on, that's what!  She transformed several pair into the sweetest decorations.


I love this line-up of wood slice ideas.  They are all so creative, but my favorites are the wall hangings and chalkboard place holder. Nancy and Roy, from our Peaceful Planet, share the how-to's. 


Who isn't charmed by a vintage Coca-Cola crate? They can be hard to find, but Mindi, from My Love to Create, made her own and it is so cool!


This mouse trap costume by Lindsey, at Simply Salvage, is so incredibly creative, I had to feature it. I think it's a hoot, and just wait till you see her hubby and son's costumes to go with it!


In the yum department, these no bake choco-peanut butter oat bars, had me at hello! Winnie, at Winnish shares the mouth-watering recipe.


Now it's your turn.  Show us what you've accomplished.  Can't wait to see what you've been up to!


The Simple and Easy Rules

1. Only projects you have made/accomplished pretty please. This means no round up of others projects, give aways etc. Items for sale are okay, as long as they are in tutorial form, and linked to your blog post.  No links to shops or Etsy stores, or round-up posts of others projects please.  Link up to 3 posts - please link posts new to this party.

2. Linking back to the party (text or button) within your post is very much appreciated . You can grab a button from the side bar if you like.

3. By linking up here, you are giving me permission to feature you here, on Facebook, Twitter, Google+ and/or Pinterest.  I'll only use 1-2 pictures from your post and link back to you. Then people will be flocking to your blog to read all about it!!  Spreadin' the love around baby!
Most importantly, go visit some of the links because otherwise it wouldn't be a party would it? 

I am no longer automatically adding you to my email list to send out reminders about the party. If you want a reminder each week, just use the little sign up form below. You will only be signing up for party notifications. I will not use this list for anything else, nor will I ever share it with anyone. ever. period.


Monday, November 17, 2014

Are you getting ready for Christmas yet?  I sort of am...at least in my shop.  I made a sample tree skirt (of course yours truly gets to keep the samples) for my store this week, which led to a matching stocking, which might lead to some matching ornaments!

It all started with this shabby chic tree skirt, made out of drop cloth fabric.  I sorta fell in love ;)

 I've been wanting a new tree skirt for the past couple of years.  Mine no longer fits my style. I'm so excited to decorate with this one this year! It is available in my store on a special order basis. You can choose to have your monogram or not.

As much as I love the Christmas tree skirt, I love the stocking even more. Lace and rhinestone trim sends it over the edge for me.


If I have time, I have created a poinsettia stencil too and may offer that option. I'm also going to do a craft show in three weeks eek!  I have so much to get done. I will be at St. David's Episcopal Church in Lansing, MI on December 6th. If you are in the area, I can't tell you how much I'd love to meet you if you can stop by and say hello!  Gotta fly...this little elf has work to do!

Blessings,

Thursday, November 13, 2014

Burlap Pumpkin Upgrade


Kicking it up a notch in the pumpkin realm. I bought this burlap pumpkin on clearance last year at JoAnn's.  I liked the pumpkin, but never liked that big fat felt stem.  This year, when I pulled it back out, I liked it even less.


I went to my local fruit market and found a stem that had broken off of a squash, which looked very much like a pumpkin stem. They let me have the stem for free.


Being careful not to snip the burlap, I cut as close to the base of the felt as possible and cut that offending stem right off my pumpkin.


Using hot glue, I glued the new stem on.  Looking better already! But the felt still showed a tiny bit around the edges, and you could see the shiny edges of the hot glue a little too. That screams poor job to me. Never, never let your hot glue show...it's kind of like wearing a killer dress with your slip hanging out the bottom.


No problem. I just wrapped a bit of Spanish moss around the stem and my pumpkin was better than new!


Five minutes and this burlap pumpkin has a new lease on life.

Blessings,


I've joined these fabulous parties:

Shabbylicious Friday at Shabby Art Boutique
Handmade Hangout at Redoux Interiors
Creative Party at Carolyn's Homework
Fabulous Friday at Simple Nature Decor


Monday, November 10, 2014

Fall Wreath


I apologize in advance for the poor quality of the pictures.  We have had days on end of clouds and rain for weeks. Sunlight has been so rare that I was diagnosed with Vitamin D deficiency and have to take prescription supplements now!

In trying to use some of my craft stash, I came across this grapevine wreath I found at a thrift store for next to nothing.  Someone had ripped some previous decorations off it and there were still bits of it left here and there. 

I had seen these adorable little putka pods for sale on Etsy and couldn't resist.  They look like teeny, tiny pumpkins. You can get them in natural or dyed, so I got a mixture of both. I got them from Cattails.


It was super easy to make.  I used some sheet moss from JoAnn's. and just pulled off small pieces of it to glue sparingly around the wreath using my trusty hot glue gun.


Then I glued the putka pods in the spaces between and some on the moss itself.


Using a burlap ribbon, I just looped a piece around the wreath and used duct tape to secure it to the back of my chalkboard.


It seemed a little bare, so I cut a stencil out using my silhouette cameo and contact paper. Then I rubbed chalk over the stencil.  Go gently here so as not to lift the edges of the stencil.


Easy as pie and perfect handwriting. I could have claimed I had mad chalk writing skills, but I cannot tell a lie.  I stink at writing on chalkboards. Shhh...it's our little secret.


My cup overfloweth.
Blessings to you and yours this Thanksgiving season!


This project was featured here!


Joining in these fabulous parties:

Project Inspired at Cupcakes and Crinoline
Tutorials and Tips at Home Stories A to Z
Inspire Me Monday at My Uncommon Slice of Suburbia
Shabbylicious Friday at Shabby Art Boutique
Handmade Hangout at Redoux Interiors
Creative Party at Carolyn's Homework
Fabulous Friday at Simple Nature Decor

Saturday, November 8, 2014

Floor Dreaming and an Interview

I am dreaming of a home with wood floors throughout. Unfortunately, when we bought our old farmhouse, it did not have a lot of character, other than high ceilings.  Most the of character had been stripped out of it with bad remodeling jobs, some of which were downright dangerous!

Source unknown

One of the things that I had hoped for when we removed the old carpeting and ugly vinyl, was good wood floors, or at least paintable wood. No such luck.  They were in rough shape. In fact someone had hammered a metal bottle cap into the kitchen floor...who does that???


Years ago we put in a Uniclick laminate floor in the kitchen.  Later we wanted to extend it to the living room, but that particular company and floor were no longer available. At the time we didn't think we could afford it, but now we want uniform floors and will have to replace all of it to get that. I wish we had talked to a professional about it.


I was recently contacted by Floor Coverings International to give an interview.  It was so exciting and such an honor to be asked!  I don't consider myself an expert designer by any means, I just have fun decorating and remodeling our own home. You can read the interview, here if you like.

If you live in the Cleveland area, and need new floors, you might want to contact Floor Coverings International.  They provide a free in-home consultation to help guide you through the many floor choices available. It might save you from making the mistakes we made.

Note: I was not compensated in any way for this post. 

Blessings,


I'm joining these lovely parties:

Project Inspired at Cupcakes and Crinoline
Tutorials and Tips at Home Stories A to Z

Thursday, November 6, 2014

A Book Page Wreath and More Fall Decor

I've been wanting to make a book page wreath for a long time. There are so many beautiful ones to inspire me I couldn't decide.  When I was putting together my fall backroom/entry table, I decided it was now or never. I think book page wreaths are pretty year round, but something about fall just seems like the perfect time for one.  They remind me of snuggling in on a cool fall night, with a good book, under a soft cuddly blanket.


I finally settled on this wreath style. Shauna at Satori Design for Living shared a tutorial.  You can go to her lovely blog to find out how to make it.

Mine is not as full as hers, but I still like the way it turned out. I would recommend hot gluing the pages on rather than pinning as I had trouble with pages popping back out, especially if I tried to fill it fuller. I will probably do that at some point.


 It is part of a fall display on a long credenza type table in our back room. The table sits at the entrance of the room, just around the corner from the back entry hall, which really is our only entry as the front door doesn't get used. You can see part of it when you walk in the door.


My pumpkins will stay out until thanksgiving. I painted the big one on the left with chalkpaint.  The vine one I bought at JoAnns last year.


The white one sits on a candlestick I picked up at a thrift store and painted silver with a black wash.


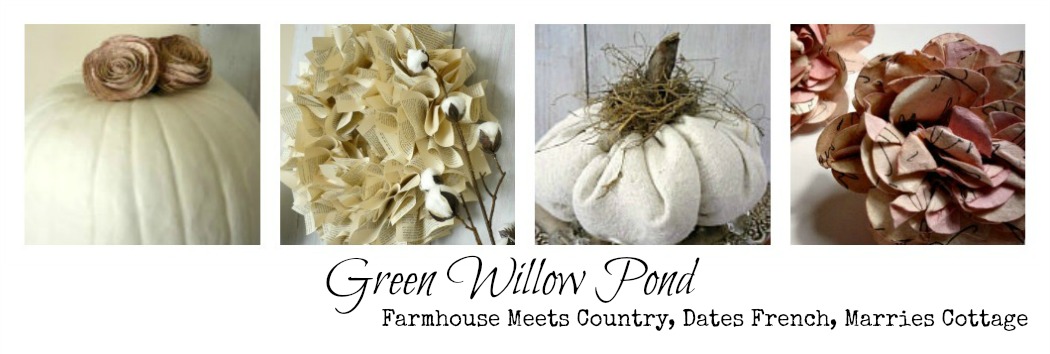
 I just set these book page roses I made a couple years ago on top of the white pumpkin.  They are tinged slightly pink with watered down craft paint.


One day last week, I walked into work and these faux cotton plants were stuck in the 70% off clearance flowers.  We had never carried them, so somebody must have returned them from another store. I snatched up three of them right away.  I love the texture they add to this display!


My drop cloth pumpkin in it's silver compote now has a place here among the pine
cones and pumpkins!


Time is flying. Thanksgiving will be here before you know it!  Have a blessed one.


Thank you Kerryanne and Suzanne for featuring my book page wreath!

I am honored and delighted that Suzanne at Pieced Pastimes included my wreath in her 2014 round up of top features for the year.  Thanks again Suzanne for hosting such a wonderful and fun party!


I shared at these wonderful parties:

Show and Tell Friday at My Romantic Home
Shabbilicious Friday at Simply Shabbilicious
Feather Nest Friday at French Country Cottage
Fabulous Friday at Simple Nature Decor
Frugal Friday at The Shabby Nest
Saturday Sparks at Pieced Pastimes
That DIY Party at DIY Showoff
Project Inspired at Cupcakes and Crinoline
Tutorials and Tips at Home Stories A to Z
Inspire Me Monday at My Uncommon Slice of Suburbia
What's it Wednesday at Ivy and Elephants
Creative Party at Carolyn's Homework

LinkWithin

Related Posts with Thumbnails